Wednesday, December 31, 2014

Cleaning Butcher Block with Lemon - Fail

Back in May my hubby and I renovated our kitchen. Well, our contractor did. And we went from this...


To THIS!


I'm STILL in love :D

But I'm learning some hard lessons about our lovely butcher block island counter. Like STAINS! EWW
I'm very diligent when using my island. Mostly dry ingredients, any wet spills are wiped up right away, and I clean it off regularly. My husband and mother in law - not so much. It's almost at the point where I need to sand down some parts and re-oil them to remove the stains. But that's what happens when you use butcher block.

I found some ideas for regular spot cleaning, one using coarse salt and half a lemon. I picked a spot on my counter to experiment on, a small-ish, relatively fresh stain.

As instructed I put on the salt, scrubbed with the lemon. No effect. I left the mixture on to set for a while. No effect.
I tried again with MORE salt and lemon.

Nope, still there. It's slightly faded, but there. 


Before
After (with new stains added)


Boo
I had high hopes that this would work. Even though it faded the stain, I have used it on other more damaged spots with zero effect. I will most likely have to sand or bleach my butcher block to remove the stains and start over again.


No Egg Oatmeal Cookies - Win!

What do you do when you're craving cookies but don't have eggs?
No Egg Oatmeal Cookies!

When I was pregnant with Baby Girl I baked... a lot. So during one of my fresh baked cookie cravings I was very disappointed to realize we'd run out of eggs. So off to Pinterest I went to see if a No Egg Cookie recipe existed, and I was pleasantly surprised!

The recipe from Spark People worked out beautifully. The cookies were a bit crunchy but still chewy, and there was no compromise on taste with the lack of egg. 


The cookies baked up perfectly. And I was really excited that there were no 'weird' ingredients in the recipe. As long as you have Quick Oats, you can make these cookies. So a definite win if you have an Egg Allergy or just don't have eggs in the house, but REALLY want cookies!

Happy Baking!

Monday, December 29, 2014

The Quest for the Perfect Soft Boiled Egg - Volume One

A couple months ago a friend of mine posted on Facebook about how she was discussing breakfasts with some coworkers and was weirded out that none of them had heard of Soft Boiled Eggs and Toast Solders. None of them.
My brother and I grew up on these tasty breakfast items, we called them Dipper Eggs. Must be my Scottish heritage. It was always a fun morning when we got to draw faces on our eggs, boil them, then lop their heads off and dip out the insides with toast sticks (solders). Yummy!
So back in November my mom came out for a visit to help with the kids while my hubby banked some major overtime, and I told her about my friends Facebook post. And that in turn became a challenge to find egg cups to hold the tasty soft boiled eggs we were going to make the next morning.

You know how many stores we went to that didn't have egg cups, or even know what they were?? 5. FIVE! Then my mom went to two other stores back in my home town and finally at store #7 was able to find lovely little egg cups.

So Christmas morning I open a box and inside was 6 little egg cups. Dipper eggs for breakfast!! Well, not Christmas Day, that was another tasty breakfast I'll report on later.

Getting to the point - Since I have not eaten dipper eggs in about 15 years, and my mom hasn't made them either. So off to Pinterest, cause it's my new recipe Google. There are so many different ways to cook soft boiled eggs!

I decided to go with the 'traditional' method. Once water is boiling, place eggs GENTLY into the water, remove pot from heat and let sit for 5 min as per the instructions. 
Results - FAIL
Eggs were barely cooked, whites were still very runny.

So the eggs (except for the one we cracked into) were returned to the water, plus one more. Boiled for 3 minutes, keeping the pot on the heat this time.
Results - Hard boiled eggs.
The egg that was replaced and not re-cooked was left in for a bit longer (I can't remember the time) and was sort of soft but mostly hard boiled. 
Fail again. But at least edible this time.

I was so disappointed I didn't even take a picture to document my failure.

I will continue to attempt to prefect the soft boiled egg, because I really want my son to experience this awesome breakfast.

Stay tuned for Volume Two

One Minute Mug Cake - Win

I have a problem, and it's name is chocolate. Sometimes I get the craving for something chocolate, but don't want to spend an hour baking. You know what I mean?
I've tried a few mug cakes with varying success. Some are super dry, some barely cook, and some require a portion of an egg and I don't like wasting egg if I can. This recipe is the best I've found so far, especially since it includes another of my top favourite foods, peanut butter. mmm....warm cake with a gooey peanut butter filing. Toss a few chocolate chips in there...Heaven. 

This mug cake takes a few minutes to whip up, and only one minute to cook as it states. My husband (not the biggest PB fan like I am) has tried other versions like adding strawberry jam in the centre instead and really enjoys the results. There is no egg in this recipe as well.

The cake comes out perfectly moist, not undercooked or dry at all. And only includes ingredients that most people have stashed in their pantry, so no last minute shopping. I followed the instructions and baked it for one minute in my microwave. This recipe is perfect for those late night chocolate cravings, but also helps keep your portions in check.
You could even bake it in some cute ramekins and serve it up for guests, or do as the original posted suggested and pop the cake out onto a plate. Personally, I just eat it right out of the mug with a huge glass of milk.


Perfection.

Wednesday, November 26, 2014

Cauliflower Cheddar Soup - Win

I started this post on Rememberance Day, which is always a hard day for me. Every veteran, every poppy, every song played by bagpipes make me think of my Grandpa, a WWII veteran. He passed away 10 years ago this past April. 
When I have a 'sad day' I tend to want to cook, bake, and roast. Note the 'and'. The only reasons I didn't make a huge batch of cookies on top of our Tuesday feast is we're still digging through masses of Halloween candy and we don't need more sugar in the house. 

But I digress

I pinned this recipe under the 'get more vegetables into my kid' recipes. Sadly, Munchkin doesn't like it, but that's because it's White Soup instead of my normal roasted vegetable Orange Soup. He won't eat it because it's not orange, not because of the flavour. I even tried adding broccoli another time to make it green (his favourite colour) and he still refused to try it on the basis that it's not the Orange Soup. Either way, the Hubby and I still like it!

This soup from Closet Cooking is very easy to make and tastes fantastic. The original recipe calls for cream and bacon bits for topping. Bacon is a treat in our house, so it's not a regular thing I have, and I'm not buying cream just for one recipe. So the bacon was eliminated and skim milk was used instead and I still ended up with a lovely, creamy soup. I also reduced the amount of broth to two cups with no ill-effect. 


Perfectly roasted
Simmering away, smelling wonderful


You can see the large pot of soup in the back of the picture below. You get a good amount for one head of cauliflower. 

I went a little kitchen crazy - soup, roasted veggies, and pot roast. And I made muffins...
The soup is lovely, and the roasting adds a lovely flavour. The second time around I added about half a broccoli head to the roasting (to make it green) and it still tasted great. This is a great make-ahead recipe for a dinner party, and keeps well for 2-3 days.

Enjoy!

Sunday, November 2, 2014

Slow Cooker BBQ Chicken - Win

Another Slowcooker win!
This recipe is perfect, with the right amount of sweet and heat. Very very simple to make with only a few ingredients, and can easily be made with frozen chicken if you adjust your cooking time. 

This winner is another via Family Fresh Meals
Now the BBQ sauce clearly affects the outcome of this dinner. I moved away from our usual sauce to try the recommended Sweet Baby Ray's, and I think we have a new favourite sauce! Feel free to use your favourite sauce, as long as it's a thicker sauce since you always end up with more liquid at the end of a Slowcooker meal. 


I definitely recommend following the suggestion of fresh kaiser buns and coleslaw for this dinner. The coleslaw adds a bit of a tart crunch that works very well. There is just a bit of heat to this chicken, I'm sure you could add in chili or even chipotle powder if you like an extra kick. Corn on the cob and a cold beer round this meal out perfectly. 
I plan to try this again with beef or pork, I think it'll be amazing!

UPDATE
I have tried this with pork and it was amazing. Make sure you use a shoulder cut of pork, since a smaller cut will dry out. Pork won't be our go-to for this recipe due to price, but it's a very lovely treat!
Enjoy!


Saturday, October 18, 2014

Free Yoga Workouts - Win

I was a nubbie yogi many lifetimes ago during university. It was a great way to stretch all the nursing school stress away. I sadly got out of it and have missed it. Now as I'm trying to get my better-than-before-baby body back, I'm trying it again for the days when I'm not doing cardio or weights.
This selection of videos is great. I tried it for the first time today and really enjoyed it

10 Free At Home Yoga Workouts for Busy Moms - or busy anyone, not just moms!

The yoga is for beginners, and as a very out of shape yogi I found the moves challenging but not too difficult I couldn't get through it or kept falling over. Each video is about 10 minutes, so you could easily do multiple videos to meek one long routine, or just one if you want to squeeze something in quickly in your day. All the videos link to YouTube and all work, so it's a good site.
I plan to repeat the first few for a week or two, then build as I become more familiar with the moves and form. 

Namaste

Friday, October 17, 2014

Apple Pie Cookies - Fail-ish

I love baking, if you haven't noticed. But when it comes to cookies, I rarely move away from my never-fail tried and true chocolate chip cookie recipe. 
But with fall here and a preschooler to entertain, I find I'm baking more. So I needed to break out of my regular (but tasty) cookie rut. 
And what better way to celebrate fall with Apple Pie Cookies! Serious! Like pie but less effort. These Apple Pie Cookies taste fantastic, but they really don't store well.

Right out of the oven, these cookies are lovely. They totally remind me of warm apple pie. However, after 24 hours they start to get super soft. After a couple days they're nearly impossible to pick up because they're almost like dough again. They still taste awesome though!
Freshly Baked
Baked on a Tuesday, soggy but still tasty on Friday


I've made these cookies twice, adding slightly more flour, increasing the cooking time, decreased the cookie size, and changing the storage method and still ended up with the same doughy results after a few days. My theory is the apple pieces leech their water into the cookie making it soft and doughy. After a few days, they are so soggy they are difficult to even pick up because they just fall apart.


These cookies still taste fantastic. They'd be perfect for a bake sale or potluck where you could bake and consume them in the same day. If I make them again I may use parchment paper for storage, and try something to keep the apples from 'leaking' so to speak. 
So these cookies are a win for taste, but a fail for long term consistency and storage. 


Wednesday, October 15, 2014

Microwave Potato Chips - Fail

Who doesn't love chips? Seriously. It's a problem, my love of chips. But they don't love me. Or maybe they love me too much, but just my hips. If you catch my drift. So microwave potato chips? Low on the fat, high on the taste! Seems too good to be true?

It is. 

This recipe needs some experimentation and I will update if I succeed in creating crispy tasty chips in my microwave. But for now, the 3 crispy 'chips' I received out of my one potato amid the soggy and the burnt isn't really doing it for me.
There are varying methods for this recipe which may explain the lack of success. Some say soak/rinse the potato slices first, some use oil and others don't, some use parchment paper. Cooking times vary between 3-6 minutes per side. 
I rinsed my potato slices, used a small amount of olive oil, salt and pepper, and placed the potato slices on a plate lined with parchment paper. I cooked the slices for about 10 min per side in 3-5 minute intervals in order to prevent burning. I only burned the last few. The rest were slightly crunchy on the outer edge but soft in the middle. Not very chip like. 

I plan to continue to experiment and I'll post my final successful recipe (if I get one). If anyone has suggestions, please leave them in the comments!

Wednesday, October 8, 2014

Slow Cooker Sesame Chicken - win!

I'm slowly falling in love with my slow cooker. The whole "set it and forget it" dinner prep is very appealing. And this recipe is a fantastic addition to my slow cooker recipe book!

The Sesame Chicken recipe literally takes 10 minutes to prep. The sauce turns out lovely and thick, but a bit on the sweet side for our tastes. Next time I may add a bit more spice and cut down the sweetness, but that's just our preference. 
I made a few alterations to the recipe 

1) I replaced 1 tbsp of olive oil for sesame oil. I love the flavour it gives Asian style foods
2) I only added 1/4 cup honey because that is all I had. I added 1.5 Tbsp of brown sugar to make it up, but I may cut it down next time
3) Onion was replaced with onion powder (I forgot I had one)
4) Chili instead of flakes


This was a quick and easy recipe. Four chicken breasts made a huge amount, we had decent dinner portions and enough for left overs. Round out your meal with some quick brown rice and steamed veggies and it's the perfect weeknight dinner with minimal effort

UPDATE
I've made this recipe a few times now. It really tastes better and cuts on the sweetness if you can use real onion, so do so if you can. I'm not an onion fan, so I still reduced the amount and had good results. And 1/4 cup honey and 1-2 tbsp brown sugar was plenty sweet enough for us, so you can adjust this recipe to your own tastes. 

Enjoy!

Friday, October 3, 2014

Overnight Oatmeal - Clean Eating Win!

I love breakfast but I find it one of the most challenging meals of the day, especially during the week when my hubby is already off at work and I have myself and two kids, plus all the fur-children to wrangle and feed. So for me, something quick, healthy, and filling is needed so I can get everyone out the door on time.
A while ago I came across recipes for Overnight Oatmeal, otherwise called Summer Oatmeal since it is typically eaten cold. I was a little apprehensive about cold oatmeal, but this past week I decided to jump in and give it a try. 

A few notes about Overnight Oatmeal...
1) Despite all the images on Pinterest, a mason jar is NOT required for this to work. After some research, other people have used plain Tupperware with a lid, or like me, a regular bowl covered with cling wrap. 
2) You can use any type of oats. Steel cut oats will give a crunchy texture, quick oats a softer oatmeal. I've used Quick Oats and Large Flake Oats and both turned out great. The large flake was a denser more chewy oatmeal, and I prefer the quick oats. You can experiment as you like.
3) Speaking of experimenting, the flavor combos are ENDLESS! No getting bored with this oatmeal!

I've tried two versions of Overnight Oatmeal. You can also add flax seeds, chai seeds, nuts, protein powder...again the options are endless. Just look on Pinterest!

My Oatmeal recipes
The measurements are approximate with the exception of the oats and milk. Everything can be adjusted to taste. 

Have fun!

Chocolate Banana and Peanut Butter

1/4 cup oats
3/4 cup almond milk 
1/2 ripe banana (can be mashed in during prep or sliced on top before eating)
Couple tsp coco powder
1 tsp honey
Couple tsp peanut butter (I may end up heating it first next time so there won't be PB globs in my oatmeal)
Mix together, cover, and let sit in the fridge overnight
When ready to eat, give it a good stir, add any toppings you'd like and enjoy


Apple Cinnamon

1/4 cup oats
3/4 cups almond milk
1/2 tsp cinnamon
1/4 tsp nutmeg
1 tbsp brown sugar
1/2 apple, chopped
Mix all ingredients except apple. Cover and let sit in fridge overnight. In am stir and add in apple.


Banana Nut


1/4 cup oats
3/4 cup almond milk
1 tsp vanilla extract
1 tsp honey
1 tbsp peanut butter (optional)
In am add sliced banana and pecans/walnuts/almonds to oatmeal


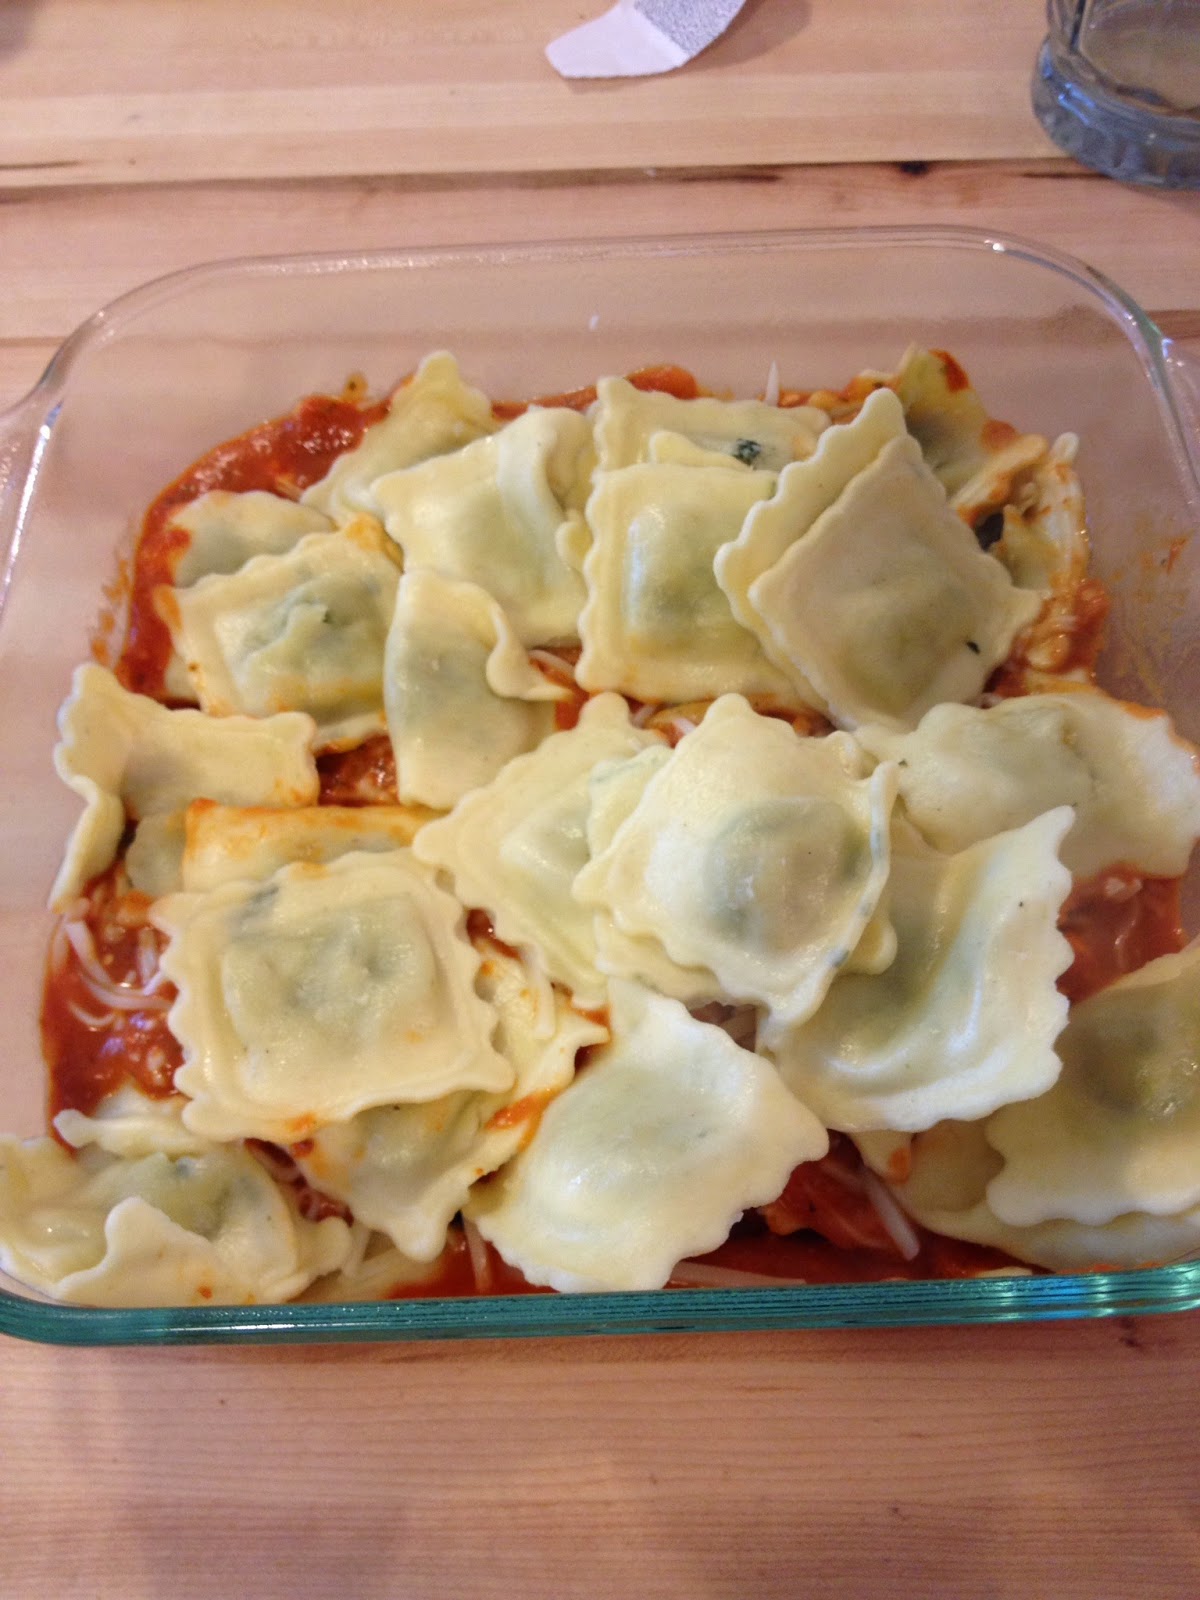
Baked Ravioli - Weeknight win!

Meals that require minimal effort that yield a tasty meal are almost always a win. Crowd pleases are an added bonus. And since Munchkin's response to this dish was "Mommy this is amazing!", it's now on our regular menu. 

My version is a combo of two recipes. One is super basic, the other adds a few ingredients and time, but I found an extra 10 minutes of cook and prep adds a great dimension to the meal. 

The basic version is simply frozen ravioli, cheese and spaghetti/marinara sauce, layered and baked. The link is here
My preference is to use this recipe, repeated below, which adds some herbs and cream cheese to the sauce. I didn't get to add any fresh basil since our September snowfall killed my already stunted plant. 

Easy to assemble, just like lasagna

Spinach and cheese ravioli works great and makes this a totally vegetarian meal. I'd love to try with a beef ravioli if I can find one. But this 30 minute meal is amazingly cheesy, perfect with salad as a side. And the leftovers are just as tasty!
Cheesy goodness!


Sprinkle your serving with a little extra parmesan cheese and chopped parsley for a lovely weeknight meal, and enjoy!

Wednesday, September 10, 2014

Strawberry Muffins - Win

I love muffins.
Seriously. Love. Muffins.
Healthy or sugar-loaded. Breakfast or snack. Muffins are almost always a winner for me.
But I've been in a muffin creativity rut lately. I usually fall back to my Apple Spiced Muffins, a recipe my mom gave me. These are muffins from my childhood and I love them. But a little variety is needed.
These Strawberry Muffins are very similar to my own Apple Spiced version, but the strawberries add a lovely sweetness/tartness to it. They're quick to whip together and definitely a tasty contender to my long standing go-to muffin.

STRAWBERRY MUFFINS

Ingredients
1/2 cup butter, softened
3/4 cup sugar
1 egg
2 cups flour
2 tsp baking powder
1/2 tsp salt
1/2 cup milk
1/2 tsp vanilla
1 1/2 cups chopped strawberries

For Topping
3 tsp sugar
1/2 tsp cinnamon

Preheat oven to 400 degrees
Cream butter and sugar in a large bowl
Add egg, mix well
In separate bowl, mix flour, baking powder and salt
Next, alternately add flour mixture and milk into butter/sugar mixture in large bowl
Add vanilla, then gently fold in strawberries
Spoon batter in to lined or greased muffin pans
Combine sugar and cinnamon and sprinkle over muffins. 
Bake for 20 min
CONSUME
 
Happy Baking!!

Thursday, September 4, 2014

Crochet Baby Hat with Flower - Win!

After completing my baby blanket project I had some yarn left over. I felt empowered by my success at this blanket, so I decided to once again attempt a hat.
Now hats are apparently and issue for me. I tried making one for myself as a trial for making one for my husband. It turned out all wonky and WAY too big, which is saying something since I come from a big-headed family. Other attempts failed as well, I never could really follow the tutorials as a rookie crocheter. 
Until this one!
She walks through it perfectly and slowly. I FINALLY got a lovely little hat! And the simple flower was a bonus from this tutorial.

A lovely little addition to my blanket project for our baby girl!


Super easy crochet blanket - Win

I had some free time waiting for baby # 2 to show up so I decided to do a little crochet.
Now I'm not a knitter. A relative tried to teach me when I was younger and it never stuck. Recently I've tried a few crochet projects which have turned into misshapen hats and headbands. Then I found this - a seemingly super simple baby blanket project. I added the hat on afterwards when I had extra yarn.

I ordered 3 different colours of yarn in worst and bulky weight. Tip - check how big each skein is, I had to dig around and find 2 more skeins when I realized one colour came with less yarn. 
The project is simple - pick different colours and weights if you like, and single chain a blanket as big as you like!


My blanket measured about 35" by 35" and is SUPER thick and soft. It's a little big to use for the car seat but it's lovely for tummy time or just warm cuddles. Next time I may use Sport weight yarn and make a lighter blanket, and maybe just a smaller version that fits better in the stroller or car seat.


Overall the project took me a couple weeks to finish, only really working in the evenings and the delay for finding extra yarn. This is a definite win project. Awesome for your self, your baby, or as a gift!

Wednesday, March 5, 2014

Simple Sesame Noodles - Win!

Back after a very long break. Pregnancy nausea and cooking don't really go well together :)

This was one of the first recipes I tried as I entered back into the kitchen. I've now made it twice and it was a huge hit both times. Takes about 10 minutes to make, even if you decide to add some protein to it!

Simple Sesame Noodles (with revisions)

12 ounces, fluid thin noodles, cooked and drained (Japanese noodles, linguini, angel hair, or spaghetti - which is what I used.)
1/4 cup soy sauce
2 tbsp sugar (I used brown sugar)
4 garlic cloves (I only used 3 - they were huge)
2 tbsp rice vinegar
3 tbsp pure sesame oil
1/2 tsp hot chili oil (replaced with 1/4 tsp chili powder)
4 tbsp canola oil (reduced to 1tbsp only)
4 whole green onions, sliced thin (Omitted - I didn't have any)
ADDITION TO ORIGINAL RECIPE - cooked shrimp or 1 inch chunks of cooked chicken, no seasoning added, cooked in sesame/canola oil (1/2 tbsp total)

Whisk together ingredients in a bowl (except noodles and green onion). Pour sauce over warm noodles and toss.
Sprinkle with green onion, toss if you wish
Serve!

This recipe is fantastic cause it fast, easy, and versatile. Again total cooking / prep time is about 10-15 minutes so this is the perfect weeknight dinner. You can easily add chicken, shrimp, or tofu plus a variety of vegetables to this recipe to round it out as a full meal. Personally I find a bowl of noodles a little unsatisfying. Pasta could be swapped for gluten free as well. 
I found the amount of oil used to be WAY too much and I never used the maximum. Next time I may eliminate the canola oil totally, or do two and two of sesame and canola oil. Cutting the oil still provided enough sauce to cover the noodles with a lovely taste. I may swap the sugar for honey next time to see if it adds to the flavour. The onion would be a great addition, so I'll plan to have it on hand next time. This time I simply garnished with sesame seeds for visual appeal. 

Not totally toddler approved - the garlic and sesame is quite potent, but I got a few bites in. 

Overall a definite win and it'll be in our regular menu!